My Pages

Tuesday, 3 August 2021

Forever Fern Stamping Suggestions and Tips


Today I wanted to show you one of my favourite stamp and die sets, Forever Fern Stamp set and the Forever Flourishing Die set.  With this set I wanted to use it as an example to show you some time saving tips. 

The reason why it is one of my favourite sets is because I find it very versatile and works with most of my other stamps and dies.  This is what I look for when I purchase a stamp set and dies  I work out how well it will work by itself and with other sets. 

Now for the for the time saving tip….. When you are using the stamp set and dies, why not do extras?  These can be in the same colour or you can make some different coloured leaves.  

The other suggestion is stamping the leaves and this is without a project or card in mind at the time but just because you have some free time to do some stamping.  I find knowing that I have them ready when I need them very satisfying.  I like to do this while watch some TV or just some quiet time in the craft room.

I have found that if I cut an A4 85mm x 297mm (length of an A4) I can get 2 strips the same size and one small piece which all fit through the Mini Stamp and Emboss Machine. 

In the video I use the thin Basic White card to stamp on and the 2021 - 2022 In Colors and Pear Pizzazz stamp pads.

The card stock I used are Evening Evergreen, Soft Succulent, Pear Pizzazz and the metallic rose gold specialty paper. 

Below are some of the stamp sets, dies and punches I have that work well with this set.

Daisy Lane and the Daisy punch, especially the small punch works so well with Forever Fern.  I like combining these two as the Daisy stamp set doesn’t have dies for the leaves. 

Jar of Flowers and Jar punch.  Again this stamp set doesn’t have dies for the these flowers so instead you could add the leaves and if you wanted a 3D card use these gorgeous jars on your card.  You could also add a Daisy or more.

Birds & Branches stamp and dies set would really benefit with the extra leaves from the Forever Fern.  

Any flower stamp you have could be used with the Forever Fern, the Artistically Inked would look lovely with some of the metallic gold leaves.

One of my favourites in the New Catalogue is the Plentiful Plants and it comes with dies.  Again you could combine it with the Forever Fern to give  a different look to your card.

Forever Blossoms stamp set and Cherry Blossoms dies is another lovely set to use with with the Forever Fern leaves. 

Here is the video, I hope you enjoy and gained some useful tips.  


Thank you for visiting my blog, and Happy Stamping.

Hx


Thursday, 1 July 2021

3D Paper Piecing

 Hi there

I have always had a passion for 3D Paper Piecing when I was younger.  I came across a website and saw some 3D Paper Piecing and I thought I would have to give it a go.  I started with the Kangaroo and Company bundle and worked out how many layers I needed and stamped five Kangaroos.  I worked out what I want at the bottom (what would be the furthest away) and decided that was the back ear and then just kept building it up and finished with the head.  I will do a video to show you how I made it.  I got so addicted to it I then tried the technique with the Snail Mail bundle.  I look forward to sharing with you how I did it with one of the products from the new catalogue.  In the meantime here are some photos of the finished products.


The below Snail card was a little easier to do.  I stamped 4 snails.  The presents are at the back then the out edge of the shell, next the inner shell and then the snail.


I thought the mushroom turned out really well too.  I stamped the image four times.  The black line on the right hand side is at the back, next the green leaves and tall mushroom, then the red mushroom and finally the small mushroom.


I was so happy how these turned out.  

Here are the measurements.

Card Base 192mm x 105mm

Scored @ 30mm & 52.5mm

Card 146mm x 103mm

DSP 142mm x 99mm

Basic White for stamping 297mm x 85mm

Card behind the image Kangaroo 100mm x 80mm, Snail 66mm x 63mm 

Basic White card under the Snail and Mushroom have the backing Snail / Mushroom stamped on it in the middle, 65mm x 65mm and cut out with the die included in the Snail Dies.


Below are the links and images of the items I used to make the cards


Thank you for visiting my blog, and Happy Stamping.

Hx


Tuesday, 4 May 2021

Grace's Garden Bridge Cards


This has to be my favourite stamp and die set, but sadly it is retiring.  I have used the gate and fence on a few projects.  The papers are from the Forever Fern which will also be discontinuing before the 3rd May 2021.  Check out my store if you wish to purchase any of the products or I have made it easy and added a link at the bottom of this blog to all the products I have used.  BUT be in quick as they are going fast!  If you already have the supplies I hope you enjoy the video below.


Here are the measurements and papers used.

Basic White 192mm x 105mm

Scored @ 30mm & 52.5mm

Forever Greenery DSP 2 @ 26mm x 101mm, 2 @ 18.5mm x 101mm & 1 @ 82.5mm x 101mm

Basic White thick 105mm x 140mm

Basic White 150mm x 100mm and 10mm x 105mm

Acetate 20mm x105mm


Enjoy the video.

Thank you, and Happy Stamping

Hx


Monday, 3 May 2021

Butterfly Beauty Bridge Card


This is a gorgeous butterfly dies.  It makes cards so easy with it being all joined and it made the bridge card so easy to make.  The papers are from Playing With Patterns  DSP.  I just loved this paper design as it reminds me of Art Deco style which I am a big fan off.  Check out my store if you wish to purchase any of the products and I have made it easy and added a link at the bottom of this blog to all the products I have used.  BUT be in quick as they are going!  If you already have the supplies I hope you enjoy the video below.


Here are the measurements and papers used.

Basic White 148mm x 158mm

Scored @ 30mm & 52.5mm

Playing with Patterns DSP 2 @ 26mm x 144mm, 2 @ 18.5mm x 144mm & 1 @ 48.5mm x 144mm

Rainbow Glimmer Paper 145mm x 105mm

Purple Posy 145mm x 105mm

Adhesive Sheet 145mm x 105mm

Basic White 19mm x 105mm


Enjoy the video.

Thank you, and Happy Stamping

                                                                        Hx 

Good Morning Magnolia Bridge Card


This is a beautiful flower and sad to say goodbye to it.  The papers, are from the Playing With Patterns DSP.  Check out my store if you wish to purchase any of the products or I have made it easy and added a link at the bottom of this blog to all the products I have used..  BUT be in quick as they are going fast!  If you already have the supplies I hope you enjoy the video below.


Here are the measurements and papers used.

Basic White 148mm x 158mm

Scored @ 30mm & 52.5mm

Playing with Patterns DSP 2 @ 26mm x 144mm, 2 @ 18.5mm x 144mm & 1 @ 48.5mm x 144mm

Basic White 110mm x 110mm  and 17mm x 105mm


Enjoy the video.

Thank you, and Happy Stamping

Hx

Thursday, 29 April 2021

Beautiful World Bridge Card


This is a great set for making masculine cards.  The papers in the suite are gorgeous.   I am looking forward to using the set with some my holiday photos (that is when we use to be able to travel lol).  Check out my store if you wish to purchase any of the products and I have made it easy and added a link at the bottom of this blog to all the products I have used.  BUT be in quick as they are going fast!  If you already have the supplies I hope you enjoy the video below.


Here are the measurements and papers used.

Basic White 148mm x 144mm

Scored @ 30mm & 52.5mm

World of Good DSP 2 @ 26mm x 144mm, 2 @ 18.5mm x 144mm & 1 @ 48.5mm x 144mm

Misty Moonlight 50mm x 145mm 

Brass Foil 60mm x 145mm (I noticed when posting this the Brass foil has sold out so you can substitute this with either the Gold or Copper foil)

Adhesive Sheet 60mm x 145mm

Basic White 19mm x 105mm

Acetate 3 pieces 25 x 105mm


Enjoy the video.


Thank you and Happy Stamping

Hx

Wednesday, 21 April 2021

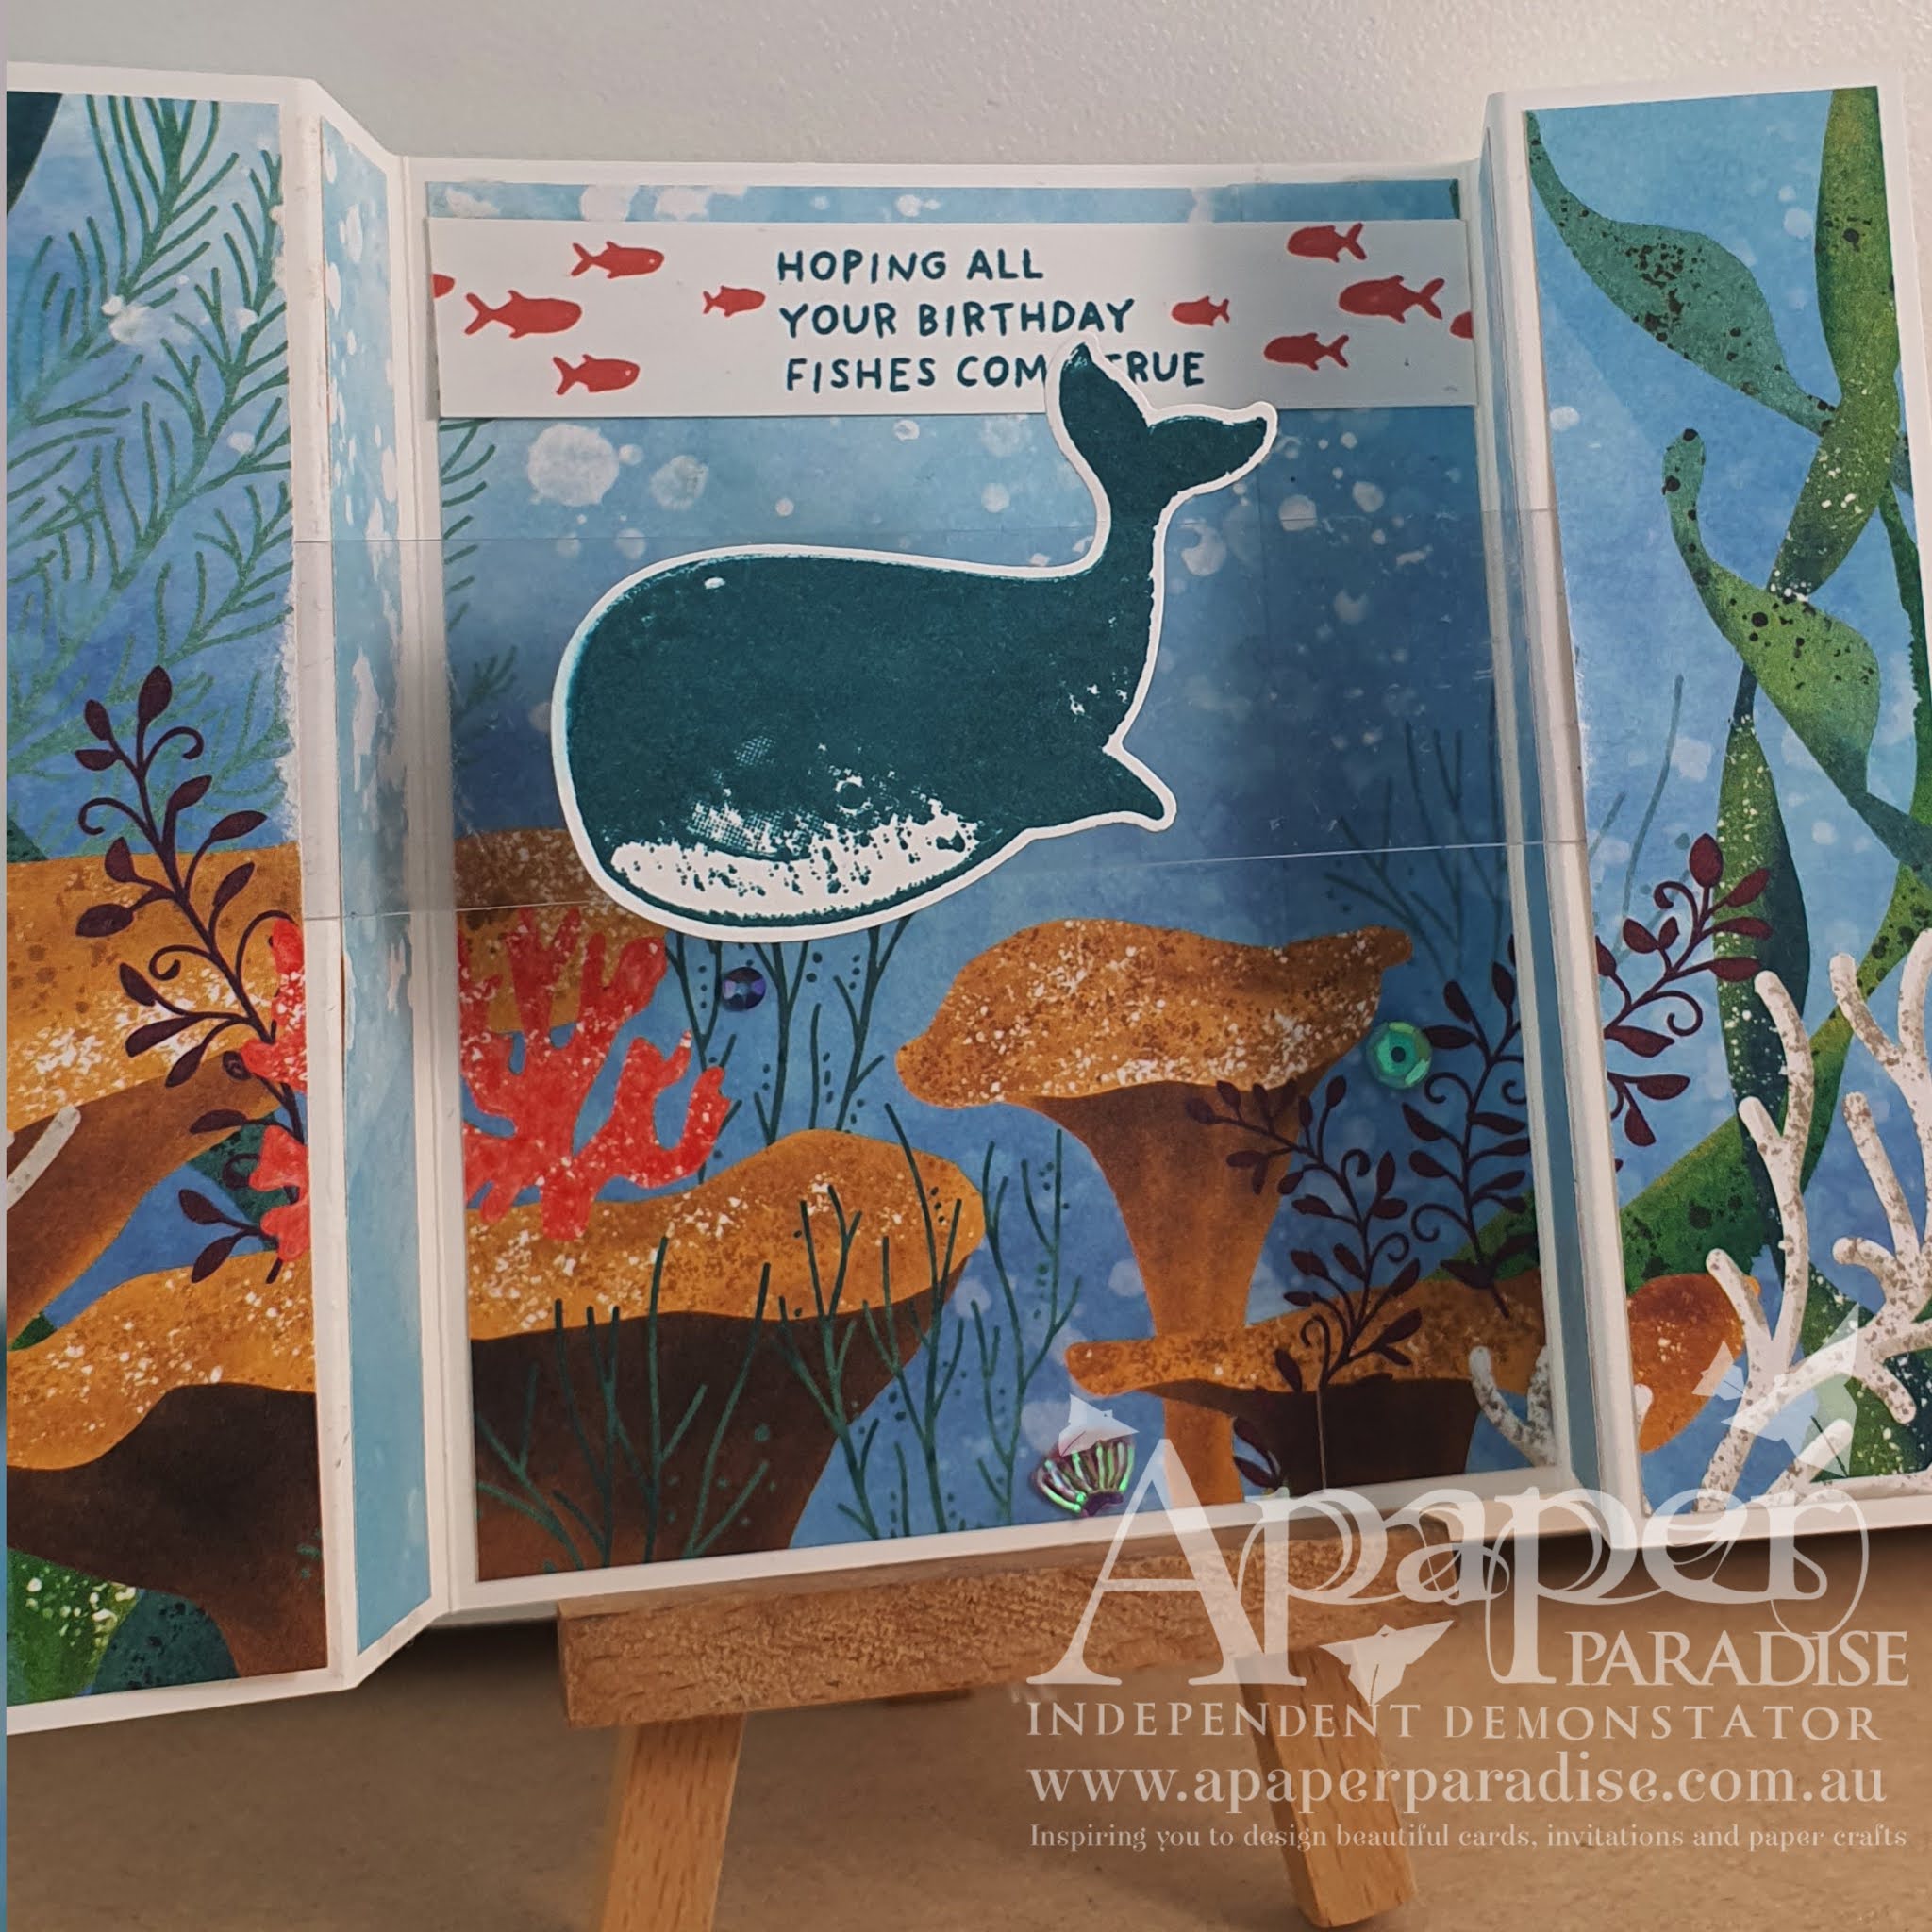
Bridge Design Cards - A Whale of a Time


I love this suite.  The papers, sequins and the embossing folder are all sadly discontinuing.  Check out my store if you wish to purchase any of the products or I have made it easy and added a link at the bottom of this blog to all the products I have used.  BUT be in quick as they are going fast (I noticed that the Terracotta Tile ink pad has sold out…. So have substituted it with a colour that is very close).  If you already have the supplies I hope you enjoy the video below.


This is the Portrait one I created using the same DSP


Here are the measurements and papers used.

Basic White 192x105mm

Scored @ 30mm & 52.5mm

Whale Of A Time 2 @ 26x101mm,

2 @ 18.5x101mm & 1 @ 82.5x101mm

Basic White 60x60mm & 15x105mm

Acetate 25x105mm


Enjoy the video.


Thank you and Happy Stamping

Hx