
Happy Shopping! Hx
Happy Shopping! Hx

I have started to make a few of these cards as thank you’s. My partner’s daughters bought us a meal to have at home… it was a lovely surprise so we wanted to say thank you. I bought the set, What’s Cookin’ so I could make cards that said thank to friends who have cooked for us or if I send a food parcel to friends. It is versatile and could be used for anything home made.
The below card I made for some friends who we sent a veggie box to to say thank you for all they do for us and the community.


I suggest
cutting the card at 210mm x 142mm and scoring at 105mm and then trim the card
down when folded in half to 99mm x 142mm
Night of Navy 148mm x 105mm
In Good Taste DSP 95mm x 99mm and 198mm x 5mm and 105mm
x 95mm
Silver Foil - strip about 20mm wide
Night of Navy - scrap for the utensils
I have a link you can click on below to take you to all the products I used to make the card.
Here is my video showing you how I made the card. I apologies in advance, it is a long video but there are a few techniques which I am sure you will enjoy and I hope will try for yourself.


Hi there and welcome.


The measurements and card that I am using are
Basic White 210mm x 148mm and score in half at 105mm
Expressions In Ink SDSP 142mm x 99mm
Be Dazzling DSP 110mm x 93mm
Basic White 90mm x 90mm & scape for the pot plant here that we cut out.
I am used memento ink to stamp the door image on the basic white. I used my Stamparatus for the stamping. I stamped the tulips at the same time in memento ink on the scrape piece of basic white.
As this is a House Warming card I just wanted the sentiment to say “Feels
like home” and not “Your friendship feels like home to me”. What I did was covered the words I didn’t
want with some washi tape. You can cut
up your stamps if you wish, it would make is easier if you were doing lots of
cards the same. But if you are like me I
get nervous about cutting the stamp up then feel free to do what I do and cover
the words…. You do have to remember to take the tape off before stamping. I have stamped on a clear sheet and then I
can position where exactly I want the sentiment on the card in the Stamparatus.
To colour the picture I am used my Stampin’ blends to colour.
The Blends I am using are:
Daffodil
Just Jade
Granny Apple Green
Pumpkin Pie
Smoky Slate
Shade Spruce
Mint Macaron
Polished Pink
Cinnamon Cider
Crumb Cake
Bronze
Color Lifter
There are a lot
of colours that I am using but feel to keep it simple and use what you
have. I will be using the Just Jade and
Granny Apple Green for all the foliage but you could use the one green instead. I am also using Polished Pink and Daffodil
for the flowers and again you could do all the flowers in the same colour and
match in with the door. Main idea is to have
fun and follow the stamped image.
Once I had completed the colouring I wanted to add some interest to the boards,
so I used the colour lifter to lift the colour just to add a subtle bit of
interest.
Cut out the tulip pot and place a mini dimensional on
the back.
With that all done all that is left is to put the card
together. I used my liquid glue and
glued the DSP down to the Basic White card.
With the Be Dazzling DSP I am going to use my paper trimmer to cut out
the middle as this will not be seen and we don’t want to waste this gorgeous
paper. I am going to allow a boarder of 15mm. I find the paper trimmer the easiest to use
to do this. You can use your snips.

Now I can use the middle piece I have cut out for
another project.
Glue the Be Dazzling down using liquid glue on an
angle.
Place Dimensionals on the back of the basic white card
and place straight and in the middle of the card. The place the potted tulip in front of the pots on the left hand side.
That is the card done.
Here is the pink one

And here is the green one I have done.

Which one do you like?
Again the stamp set is only available until 30th
September 2021 with a $90 order. If you
need any help please feel free to reach out to me in the comments.
I hope you have enjoy the video below.


This is the screen shot of the page when you are entitled to a FREE
product to add to your shopping cart 🛒

For information on what products I used to make the card click on the below link. Check out the video at the end too 😀.


This is the screen shot of the page when you are entitled to a FREE
product to add to your shopping cart 🛒

For information on what products I used to make the card click on the below link. Check out the video at the end too 😀
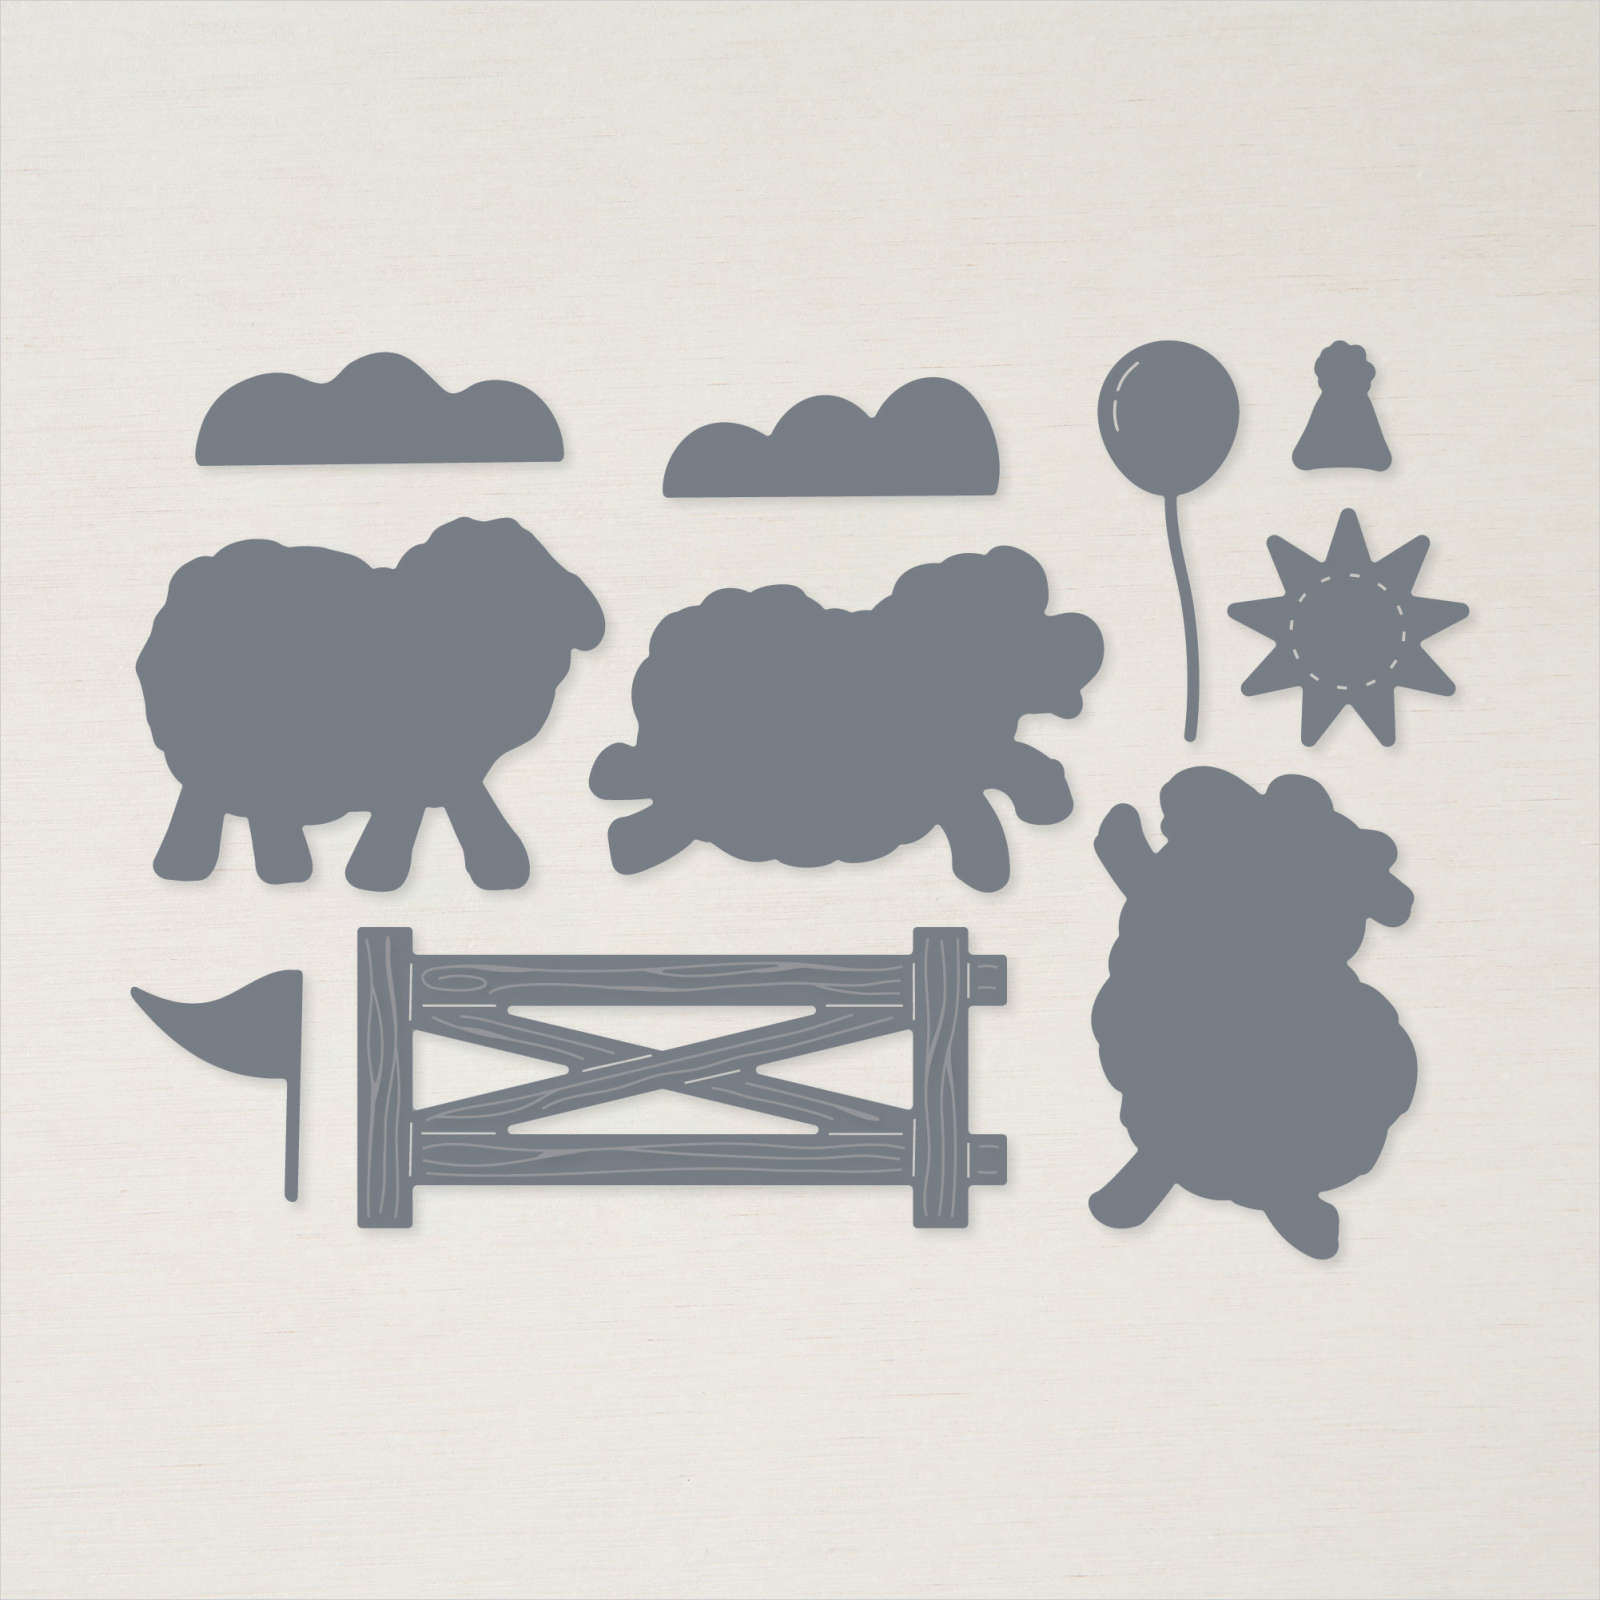
This is a fun card. I used the Give It A Whirl dies. This
made the card interactive as the wheel (cut out of acetate) can move
around making the sheep looking like it is jumping over the fence.

Now I didn't come up with this idea.... I CASEd the card from Cardnmum
by Jen Morgano, I just loved the idea. Here is a little video showing you
how it works.
I will do a video to show you how to use this die. I think this dies set, Give It A Whirl, will work with so many of my stamps.... I think dies that you can use with lots of what you already have a great way to put some new life into your stamp set.
On this card I have used a couple of the free products in the SALE a-bration catalogue, Counting Sheep and Sheep dies, these coordinate together. Choose the free SALE a-bration product with every $90 AUD you spend, if you want both the stamp set and dies you will need to spend $180 AUD.

This is the screen shot of the page when you are entitled to a FREE product to add to your shopping cart 🛒

For information on what products I used to make the card click on the below link. Check out the video at the end too 😀
Below is my quick video showing you the cards.
When Shopping make sure that you are shopping with Helen Reeve (me 😀) I have highlighted below if it isn't showing my name.


Hx

Today I wanted to show you one of my favourite stamp and die sets,
Forever Fern Stamp set and the Forever Flourishing Die set. With this set
I wanted to use it as an example to show you some time saving tips.
The reason why it is one of my favourite sets is because I find it very
versatile and works with most of my other stamps and dies. This is what I
look for when I purchase a stamp set and dies
I work out how well it will work by itself and with other sets.
Now for the for the time saving tip….. When you are using the stamp set and dies, why not do extras? These can be in the same colour or you can make some different coloured leaves.
The other suggestion is stamping the leaves and this is without a
project or card in mind at the time but just because you have some free time to
do some stamping. I find knowing that I
have them ready when I need them very satisfying. I like to do this while watch some TV or just
some quiet time in the craft room.
I have found that if I cut an A4 85mm x 297mm (length of an A4) I can get 2 strips the same size and one small piece which all fit through the Mini Stamp and Emboss Machine.
In the video I use the thin Basic White card to stamp on and the 2021 - 2022 In Colors and Pear Pizzazz stamp pads.
The card stock I used are Evening Evergreen, Soft Succulent, Pear Pizzazz and the metallic rose gold specialty paper.
Below are some of the stamp sets, dies and punches I have that
work well with this set.
Daisy Lane and the Daisy punch, especially the small punch works so well
with Forever Fern. I like combining
these two as the Daisy stamp set doesn’t have dies for the leaves.
Jar of Flowers and Jar punch. Again this stamp set doesn’t have dies for
the these flowers so instead you could add the leaves and if you wanted a 3D
card use these gorgeous jars on your card.
You could also add a Daisy or more.
Birds & Branches stamp and dies set would really benefit with the
extra leaves from the Forever Fern.
Any flower stamp you have could be used with the Forever Fern, the
Artistically Inked would look lovely with some of the metallic gold leaves.
One of my favourites in the New Catalogue is the Plentiful Plants and it
comes with dies. Again you could combine
it with the Forever Fern to give a
different look to your card.
Forever Blossoms stamp set and Cherry Blossoms dies is another lovely set to use with with the Forever Fern leaves.
Here is the video, I hope you enjoy and gained some useful tips.
Hx
Hi there
I have always had a passion for 3D Paper Piecing when I was younger. I came across a website and saw some 3D Paper Piecing and I thought I would have to give it a go. I started with the Kangaroo and Company bundle and worked out how many layers I needed and stamped five Kangaroos. I worked out what I want at the bottom (what would be the furthest away) and decided that was the back ear and then just kept building it up and finished with the head. I will do a video to show you how I made it. I got so addicted to it I then tried the technique with the Snail Mail bundle. I look forward to sharing with you how I did it with one of the products from the new catalogue. In the meantime here are some photos of the finished products.


Card Base 192mm x 105mm
Scored @ 30mm & 52.5mm
Card 146mm x 103mm
DSP 142mm x 99mm
Basic White for stamping 297mm x 85mm
Card behind the image Kangaroo 100mm x 80mm, Snail 66mm x 63mm
Basic White card under the Snail and Mushroom have the backing Snail / Mushroom stamped on it in the middle, 65mm x 65mm and cut out with the die included in the Snail Dies.
Below are the links and images of the items I used to make the cards


Hx
